> ## Documentation Index
> Fetch the complete documentation index at: https://docs.literalai.com/llms.txt
> Use this file to discover all available pages before exploring further.
# LLM
> Manage your LLM credentials and costs.
## Credentials
### Supported providers
Credentials are stored online, and keys are encrypted.
Literal AI supports all major LLM providers:
* OpenAI
* Mistral
* Anthropic
* Google
* Azure OpenAI
* Amazon Bedrock
* Groq
Adding a credential is as simple as providing an API key:
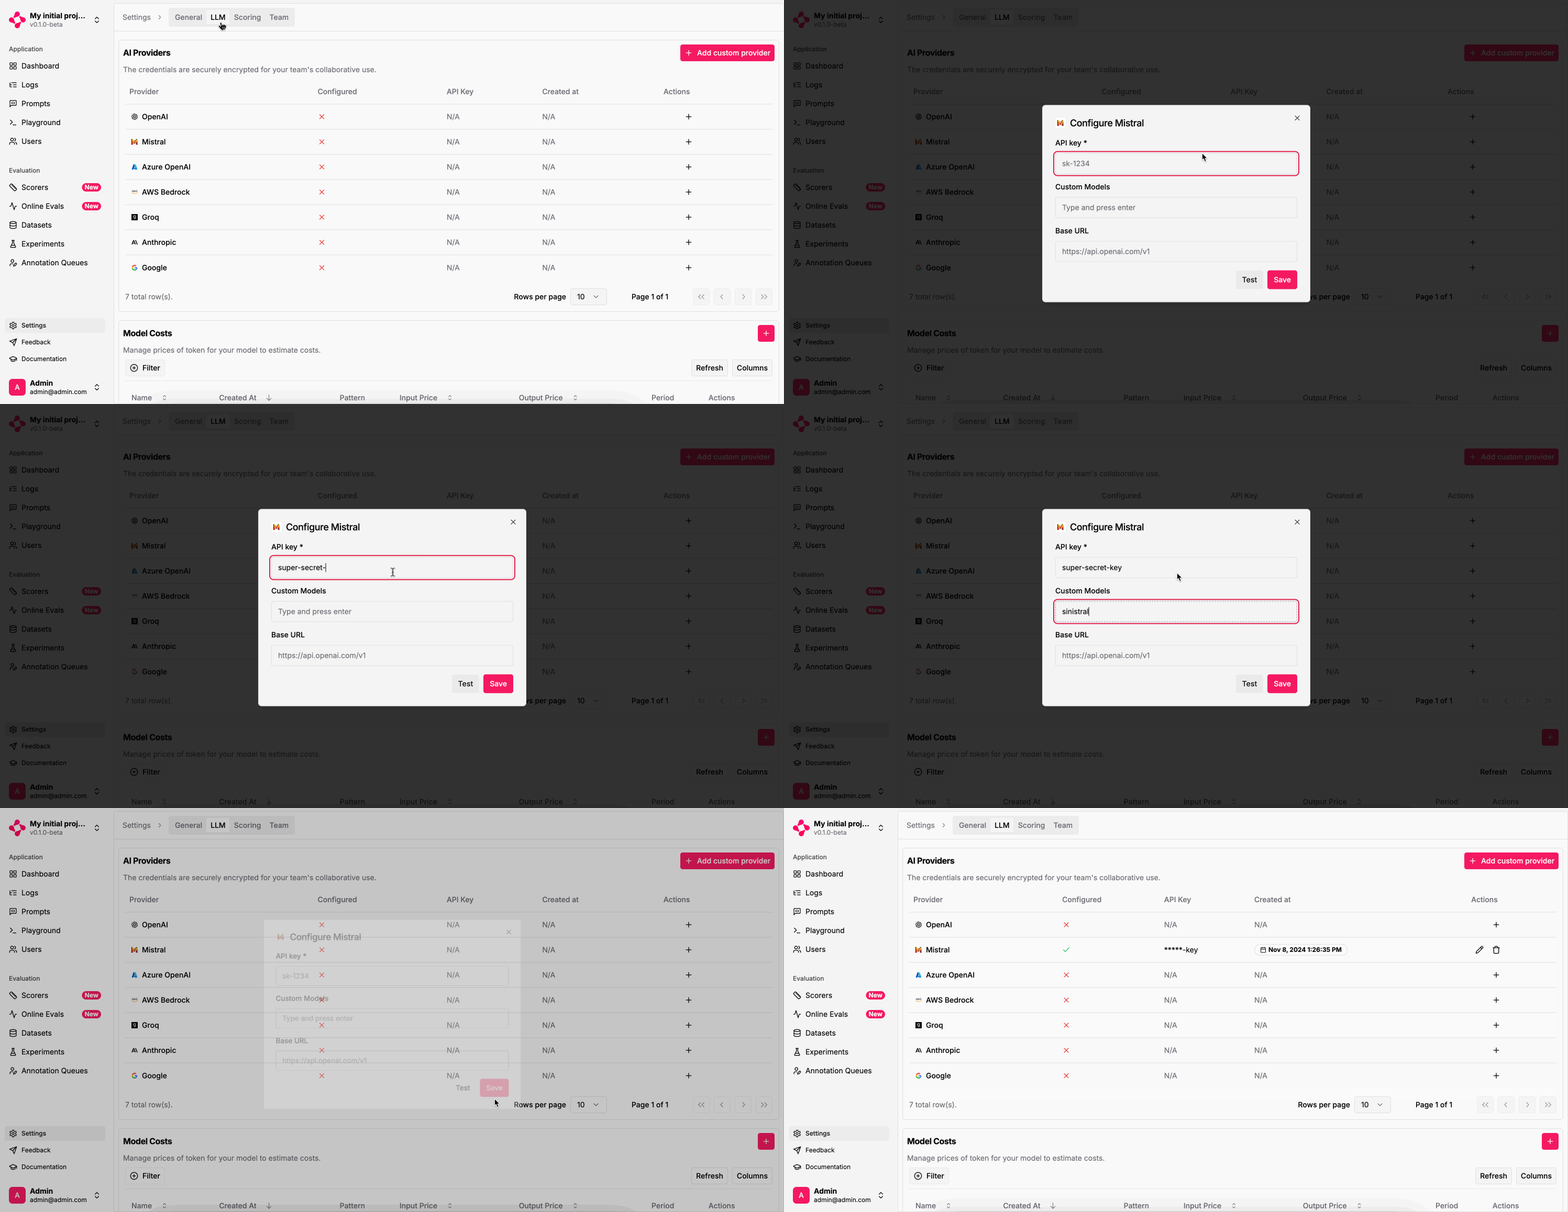 Literal AI comes with a set of pre-configured models for each provider, but you can add your own.\
*Custom Models* should be the list of models you fine-tuned on specific providers.
All credentials can be **used** by any Admin or AI Engineer on your team.\
Once added, credentials are not visible anymore. Admins may edit or delete credentials.
**Azure OpenAI** and **Amazon Bedrock** have additional fields to configure.
For Azure OpenAI, you need to map the Azure OpenAI endpoint to the following format:
`https://YOUR_RESOURCE_NAME.openai.azure.com/openai/deployments/YOUR_DEPLOYMENT_NAME/chat/completions?api-version=2024-06-01`
For instance,
`https://my_instance.openai.azure.com/openai/deployments/gpt-4o/chat/completions?api-version=2024-06-01`
would map to the following Literal AI provider:
Literal AI comes with a set of pre-configured models for each provider, but you can add your own.\
*Custom Models* should be the list of models you fine-tuned on specific providers.
All credentials can be **used** by any Admin or AI Engineer on your team.\
Once added, credentials are not visible anymore. Admins may edit or delete credentials.
**Azure OpenAI** and **Amazon Bedrock** have additional fields to configure.
For Azure OpenAI, you need to map the Azure OpenAI endpoint to the following format:
`https://YOUR_RESOURCE_NAME.openai.azure.com/openai/deployments/YOUR_DEPLOYMENT_NAME/chat/completions?api-version=2024-06-01`
For instance,
`https://my_instance.openai.azure.com/openai/deployments/gpt-4o/chat/completions?api-version=2024-06-01`
would map to the following Literal AI provider:
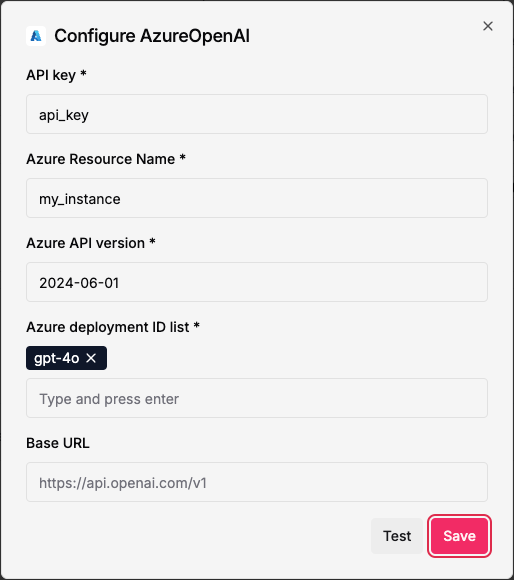 No need to add a base URL to the endpoint!
### Custom providers
If your LLM provider does not fall into one of the above, you may define your own, custom.
In addition to the API key, you provide a base URL and the available models.
The chat completions endpoint should follow OpenAI's API format.
No need to add a base URL to the endpoint!
### Custom providers
If your LLM provider does not fall into one of the above, you may define your own, custom.
In addition to the API key, you provide a base URL and the available models.
The chat completions endpoint should follow OpenAI's API format.
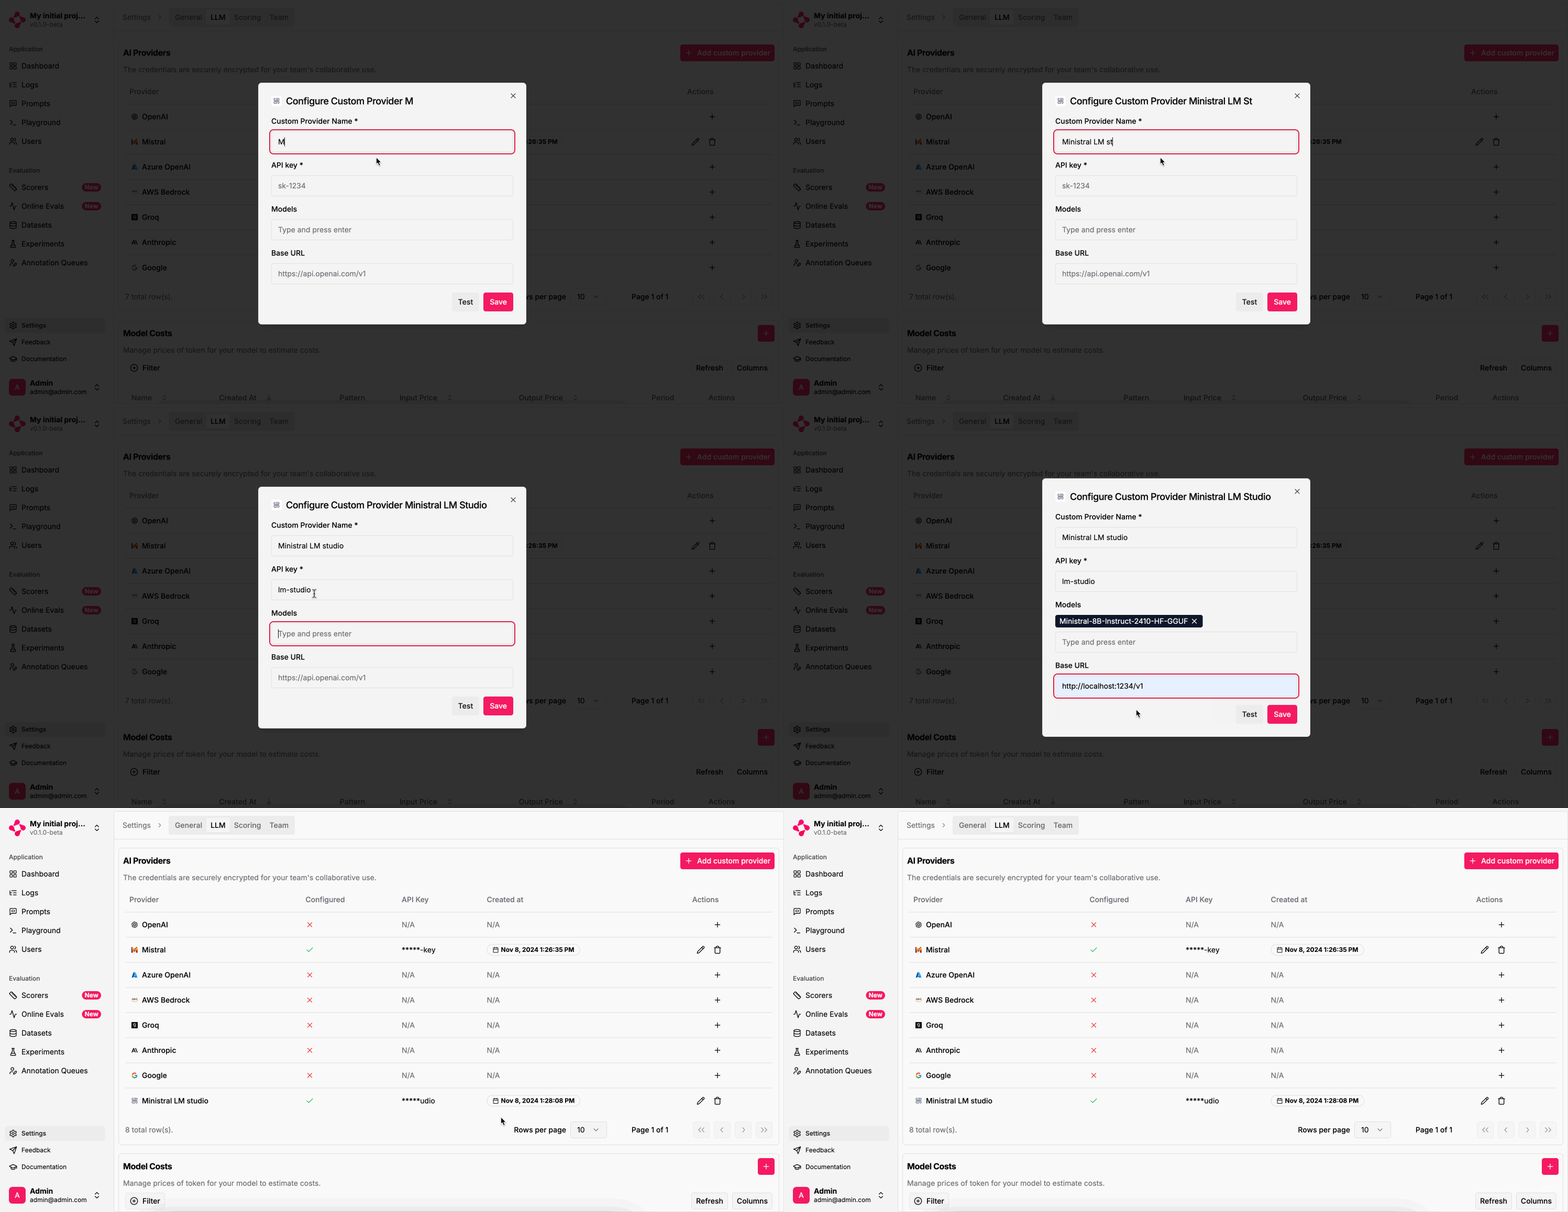 Make sure your endpoint is reachable from the Internet!\
Especially if using LM Studio with `http://localhost:1234/v1` 😉
## Cost Tracking
Keep an eye on the financial aspects of your LLM application:
Navigate to the "Settings" section and select the "LLM" tab.
Configure the cost per token for each model you're using to enable precise cost tracking:
* **Pattern**: Specify a regular expression to match the model name (e.g., "gpt-4o\*" for all GPT-4o variants)
* **Input Price**: Set the cost for input tokens in USD per million tokens
* **Output Price**: Set the cost for output tokens in USD per million tokens
* **Period**: Optionally define start and end dates for time-specific pricing (useful for handling price changes)
You can add multiple model configurations to accurately track expenses across your LLM providers.
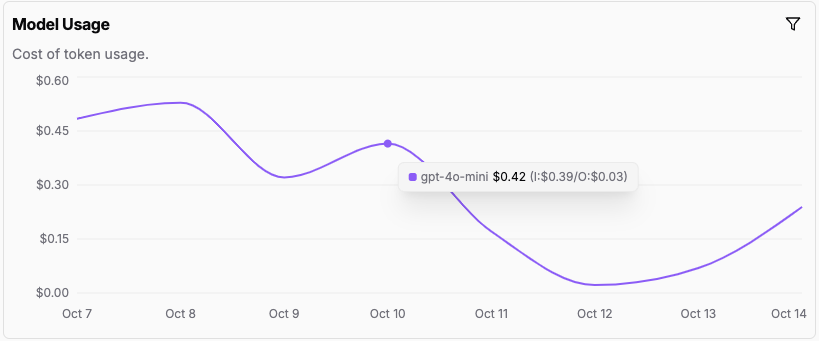
Return to the main dashboard to view cost metrics over time, including total cost, cost per conversation, and cost breakdowns by model.
Make sure your endpoint is reachable from the Internet!\
Especially if using LM Studio with `http://localhost:1234/v1` 😉
## Cost Tracking
Keep an eye on the financial aspects of your LLM application:
Navigate to the "Settings" section and select the "LLM" tab.
Configure the cost per token for each model you're using to enable precise cost tracking:
* **Pattern**: Specify a regular expression to match the model name (e.g., "gpt-4o\*" for all GPT-4o variants)
* **Input Price**: Set the cost for input tokens in USD per million tokens
* **Output Price**: Set the cost for output tokens in USD per million tokens
* **Period**: Optionally define start and end dates for time-specific pricing (useful for handling price changes)
You can add multiple model configurations to accurately track expenses across your LLM providers.
Return to the main dashboard to view cost metrics over time, including total cost, cost per conversation, and cost breakdowns by model.